FIX CSGO VAC WAS UNABLE TO VERIFY SESSION 2020
- Counter-Strike: Global Offensive
- Jul 07, 2020
- Daniel Russo
- 6
- 0
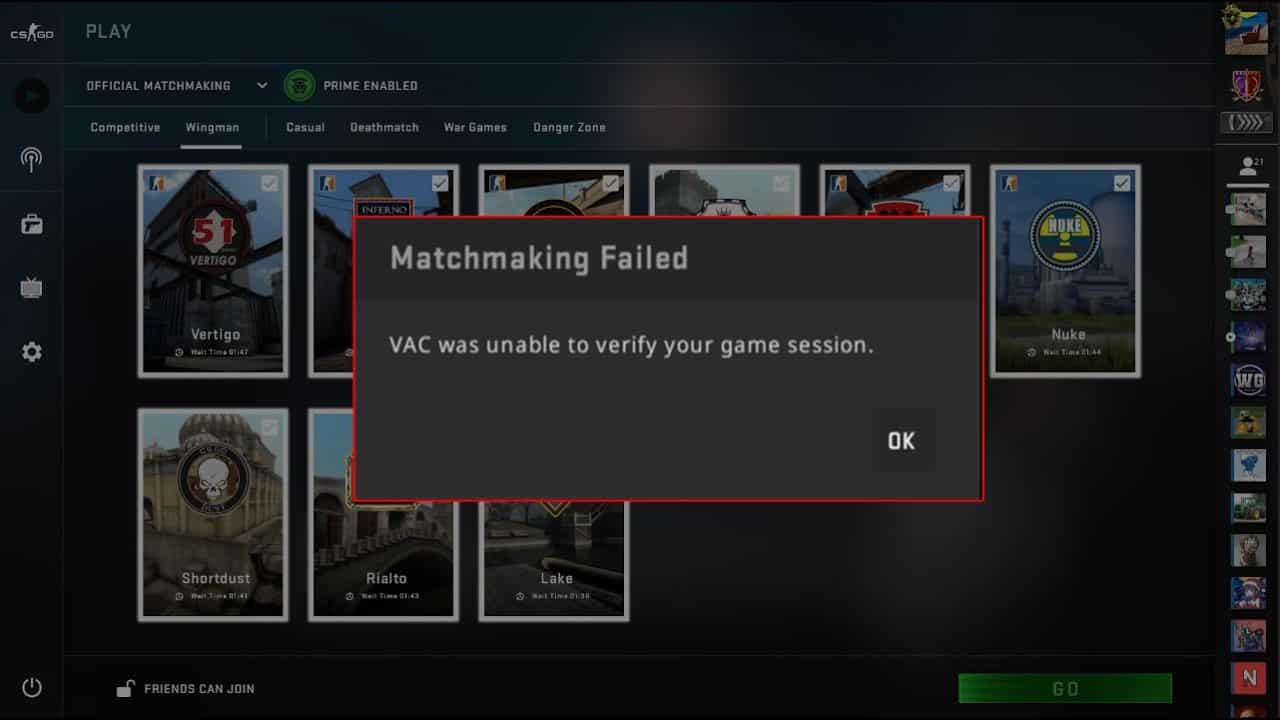
Being unable to verify a session is the most commonly occurring error in the game, which players face every once in a while. While starting competitive matchmaking, the servers say, “vac was unable to verify your session,” and then it closes.
This is quite irritating sometimes as it won’t let the players enter the official competitive game modes. Don’t worry; everything has a fix, and we’re going to give you some options to repair this issue. Read on to find out how you can fix the issue.
WHY DOES THIS OCCUR?
Vac could be unable to verify your game session due to a recent update of your game or your Steam client. The updates could have resulted in some file crash or damage in your main folder of global offensive. You can verify the game or the game session to fix it.
In some cases, the PC graphic drivers can also be an issue, and doing some tweaks to your PC can fix it or simply verify your game.Considering you’re not actually doing something unacceptable in the game, there are some options available to fix the game.
FIXES YOU CAN TRY
- Restart your Steam client.
- Verify the game files.
- Repair your Steam client.
- Update drivers in your system.
Every one of the above processes is given below in detail, and following it step-by-step would solve your problem. Do note that this does not work every time, and some people still have issues after trying all of them.
RESTART YOUR STEAM CLIENT
Come out of the game into your Steam client and follow the exact process of restarting your Steam client. This is the most basic fix that works most of the time.
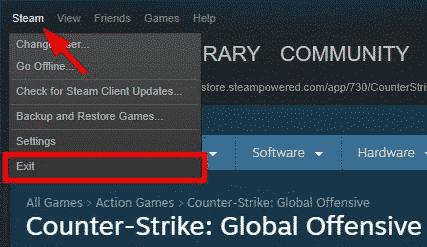
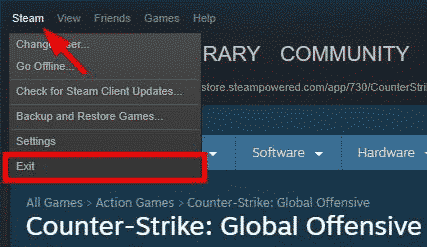
Step 1: In your Steam client, click on the top left corner. From the dropdown menu, select exit. Doing this will remove the current ongoing Steam process from your PC.
Step 2: Restart your Steam client and then click on Steam again. Click on “Go Offline” from the dropdown.

Step 3: In the new popup window, select “RESTART IN OFFLINE MODE.’
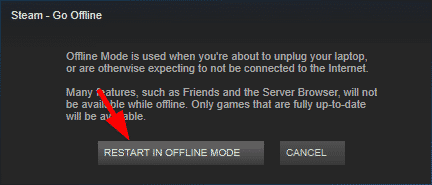
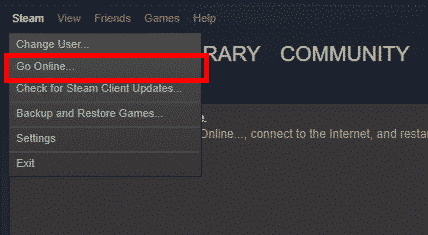
Step 4: Once it opens in offline mode, click on steam again, and select “Go Online”.
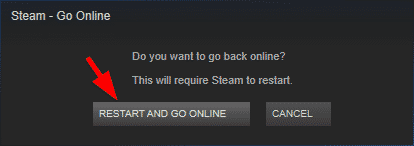
Step 4: From the new window, select “RESTART AND GO ONLINE”.
Now restart your global offensive game and check if the problem is solved. If not, keep trying the other methods given below.
VERIFY CSGO GAME FILES TO FIX VAC WAS UNABLE TO VERIFY
Some updates might have caused an error in your game files and doing this verifies all the files and then fixes them accordingly. You can check in the Steam client to verify the CSGO Game files to make sure none of them are corrupted.
VAC is the valve anticheat system developed by valve corporation, the game counter strike is full of hackers, and valve anticheat was a method to get rid of such hackers. Make sure your antivirus software is also disabled.
Step 1: Head over to the library section in the Steam Client where all your games are available.

Step 2: Right-click on CSGO and select properties at the end of the list.

Step 3: From the new tab, click on Local files.
Step 4: Click on “VERIFY INTEGRITY OF GAME FILES”.
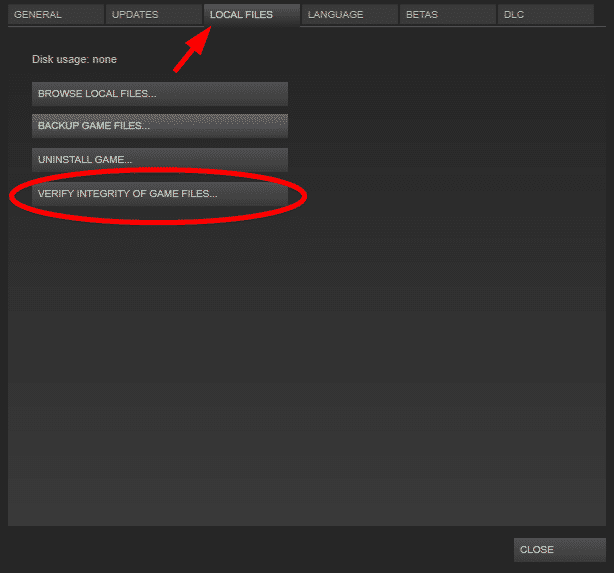
Step 5: Click ok to finish.
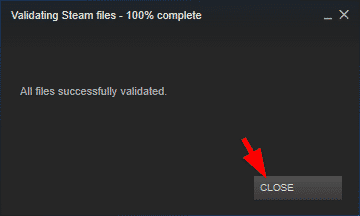
This should solve all the damaged files that might be causing a problem during game verification. Try opening the game and check if this worked. If not, continue the steps below.
REPAIR STEAM CLIENT
There might be some problems in the Steam client which is interfering with the vac being unable to verify the process, and repairing it is the ideal solution. Follow the steps below exactly to make sure there’s no error furthermore in the game.
Step 1: Click on steam and exit the game as mentioned in the first fix attempt.
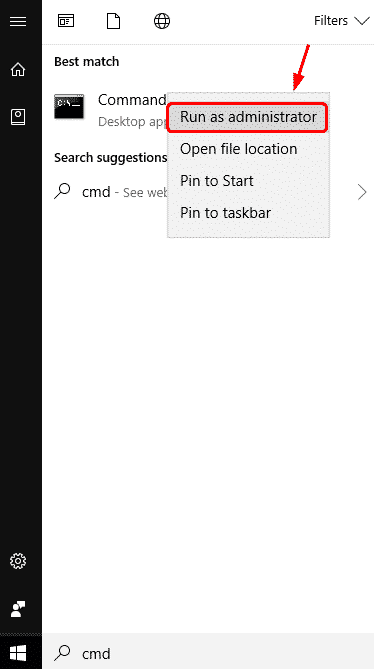
Step 2: Press windows and search cmd. Right-click on Command Prompt and click “Run as Administrator”.
Step 3: After it opens, run the command below in the command prompt.
“C:\Program Files (x86)\Steam\bin\SteamService.exe” /repair
It might take some so don’t worry that it has frozen. After the process is complete, open the Steam Client and run the game again to check if the issue is fixed or not. This is the best working method that has worked for fixing the error for many people. If the problem persists, try the last method below.
UPDATE SYSTEM DRIVERS
Having an older version of drivers can also cause a problem in many rare cases. Fixing your drivers can solve the issues. In some systems, the updates are set automatically, so your drivers are updated, but you have to do it manually if that’s not the case.
First, you need to make sure the basic drivers are up to date.
- Goto settings > updates and security.
- Click on the update and wait for the completion.
- Download and install the update.
- Goto control panel > hardware and sound > Device manager. Look for a yellow sign in front of the related driver. Double click and open the setting of the particular driver.
- Click on update driver.
The basic drivers will be updated and try updating the Intel integrated graphics driver too. Next updating the dedicated graphics driver might solve your problem.
- Click and open your dedicated graphic control panel.
- Go to the driver’s section.
- Check if there’s an update available. If yes, download and install it.
These solutions might fix your “VAC was unable to verify session” in CSGO and there’s nothing you can d/o beyond that.
VERIFY DLL FILE
If you’re facing an issue, you can find the Steam service DLL file in the Program Files folder present in Local Disk C on your computer. You can also locate the second DLL file within the Steam installation directory.
If the two files differ from each other, the VAC will not be able to verify the gaming session. To fix this issue, you have to copy the first DLL file and use it to replace the second. Follow these steps:
- Go to the path C > Program Files (x86) > Steam > Bin and find Steam installation directory.
- Find the “Steamservice.dll” file, right-click on it, and copy it.
- Go to “C > Program Files (x86) > Common Files > Steam” and then paste the .dll file that you previously copied. If you receive a prompt that the file already exists, you must replace it.
- Launch the game now and see if the error still persists.
STILL NOT FIXED?
The last option for you is contacting Steam support. You can create a ticket related to your query on the Steam support but expect a delayed response. Support for every company is quite busy right now, being heavy user demand in the market. You will definitely get a solution if vac was unable to verify the issue from the support easily!
There’s another fix you can try, which is reinstalling the game. A fresh CSGO download and installation from Steam has been reported sometimes to fix vac was unable to verify the issue.
You can right-click on CSGO in the library and go to the properties to find an option to uninstall the game. Then re-download and install from the Library again.
These are some of the major problems faced by players every day in the competitive matchmaking side. Valve has still not fixed this issue for the players. Sometimes this can be irritating as it creates a barrier for the players.
If these tips worked for you, do comment below which method worked in fixing your problems. If not, keep trying because sometimes, vac unable to verify gets fixed automatically.
Leave a Comment
You must be logged in to post a comment.


